
How to Make New Lead Soft Jaws
It’s important to replace soft jaws when steel gets embedded into them. Failing to replace your vise jaws can result in ruined guns or scratched barrels. I always fold my old soft jaws in half when this happens—preventing me from using them again and messing up a gun.
To replace my old vise jaws, I welded a mold and poured new lead soft jaws. I decided to make a video on this process because I couldn’t find any resources on the internet about it. This idea and process, however, isn’t original. I learned it in gunsmithing school at Trinidad State and thought it might be helpful for other gunsmiths out there.
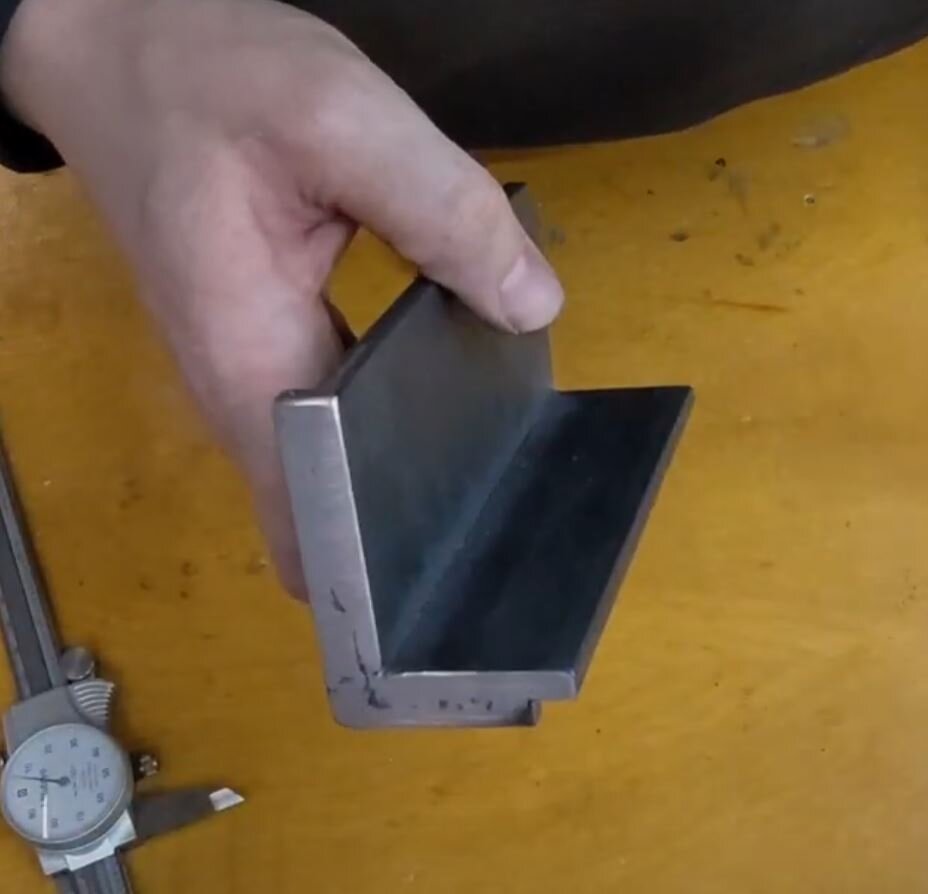
The mold is comprised of two parts which create a hollow L-shape to form the hot lead into shape of vise jaws.
Tools and Materials
Before getting started, make sure you have the following tools and materials.
Tools Needed:
Welder
Lead Pot
Torch
Tongs or Pliers
Soft Mallet
The final dimensions of your new vise jaws will be the height of your top mold minus 1/4”. So take that into consideration when you are designing the mold to match your vise. These dimensions are specific to my needs. Adjust yours accordingly.
Materials Needed:
1 Foot of 1/4” x 1/4” Hot Rolled Steel
One piece of 1/4” (thick) 1.5” (wide) x 6” long Hot Roll Steel
Three pieces of 1/4” (thick) x 2.5” (wide) x 6” (long) Hot Rolled Steel
Lead—this can be your old jaws
Step 1: Making the Mold

Step 1.2 Bottom Part of Mold
Any welds on the inside joints will show up in the mold. I suggest tacking the corners to seal (this will suffice for lead). Try to keep most of the welds outside of the mold.
Weld two pieces of 1/4” (thick) x 2.5” (wide) x 6” (long) hot rolled steel together. This forms the bottom part of your mold. On the bottom part, you’ll need three 1/4” x 1/4” pieces of steel: one for the length of the top piece and one for each the height and the depth. Cut the 1/4” x 1/4” steel a bit longer than you need. Then, on the inside of the L shape, tack them on and grind off the ends to fit.
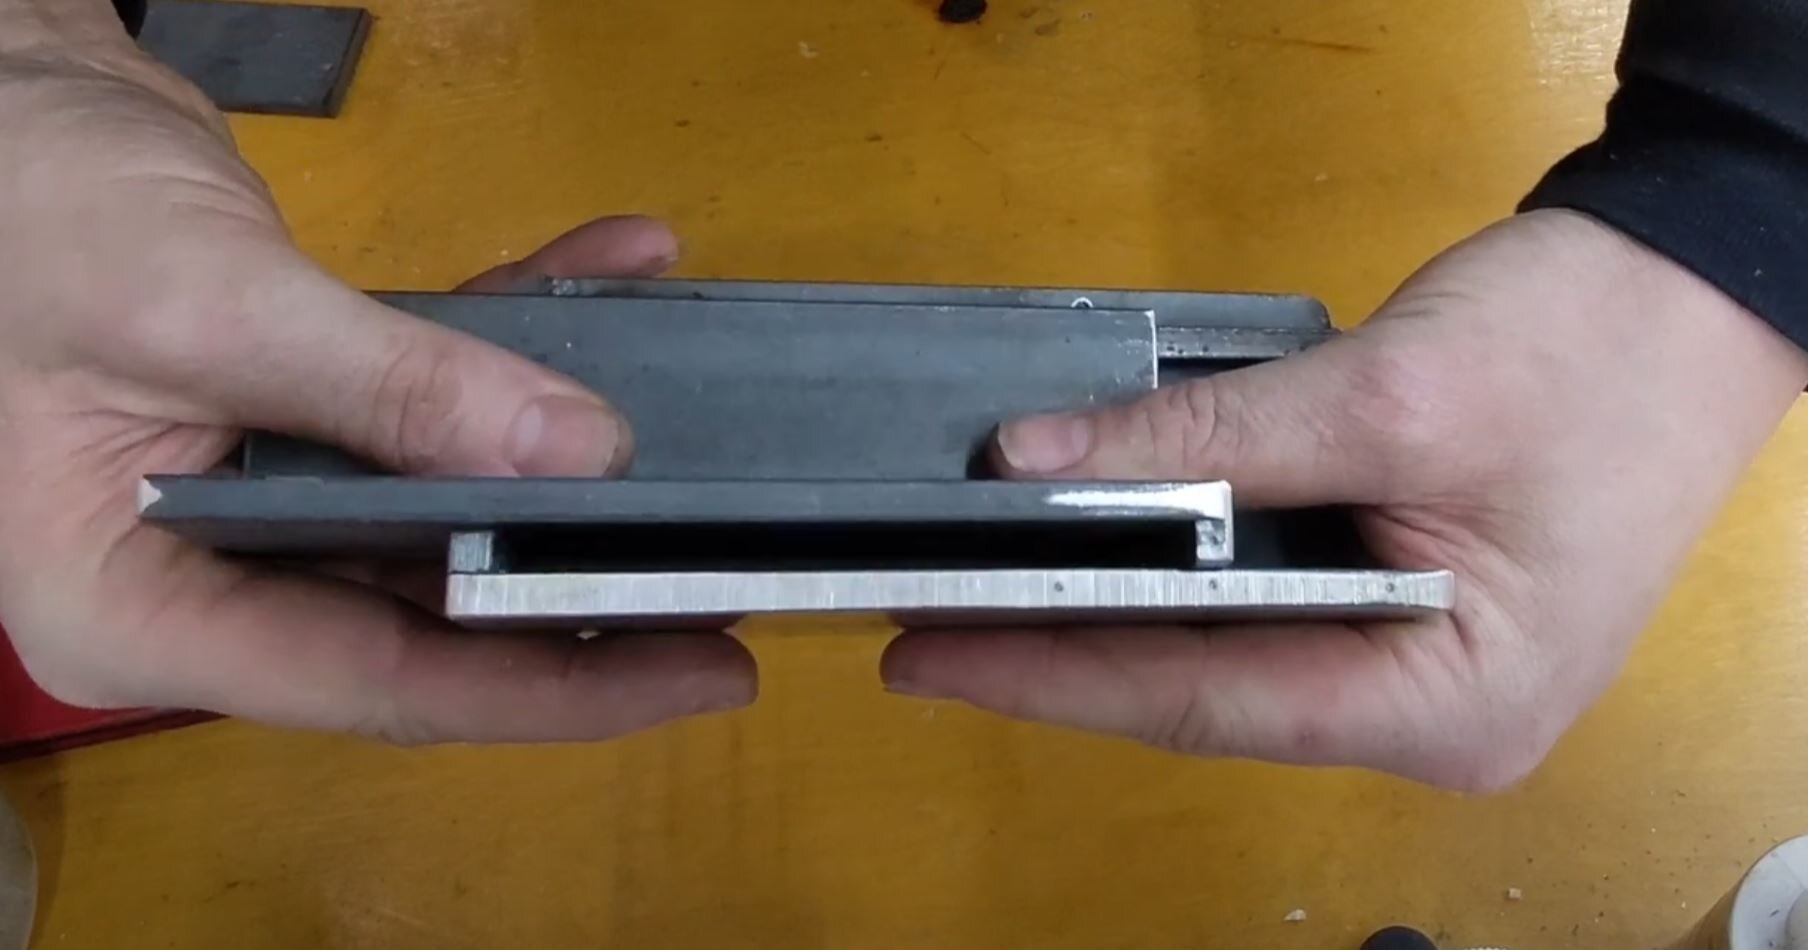
Weld the remaining piece of 1/4” (thick) x 2.5” (wide) x 6” (long) to the only piece of 1/4” (thick) 1.5” (wide) x 6” long. This forms the top part of your mold. On the top part of the mold, you’ll need two 1/4” x 1/4” pieces of steel: one is for the depth and one for the height. For the depth piece, cut the 1/4” x 1/4” steel a bit long. Then tack it onto the outside of the L shape and grind off the end to fit. The height piece will need to fit just under the length piece welded to the bottom part of the mold—cut it accordingly. This will enable the top mold to slide along the bottom—allowing you to make different size lead jaws. This piece will probably need to be ground to fit after welding it on.
Optional: If you have multiple vises like we do, I suggest stamping reference marks on the top of the mold so you can use them to make various size soft jaws. Clean up the outsides and round of the corners too, if you want. This isn’t required and is just for looks.

Step 2: Pouring the Lead
If you have a smaller lead pot like I do, it will benefit you to pre-heat the molds. Use a torch to heat up the molds (especially the bottom of the mold) while the lead is melting. This will ensure the lead fills all the way. Some people might be able to skip this step, but if you’re having issues with your pour, try pre-heating the mold.
While the lead melts, use a piece of metal to skim off the junk from the lead. This will make your lead cleaner.
Pour the molten lead into the mold and make sure the entire thing fills. Use tongs to pull it out of the mold.
Step 3: Forming to the Vise
Put the new lead soft jaws on the vise. Close the vise so that the faces of the jaws are touching.
Using a soft hammer or mallet, center the soft jaws on the vise.
Tighten the vise down and use a soft mallet to form the jaws to the vise.

That’s how to make new lead vise jaws. We hope you found this video and explanation useful. If you have any questions, please comment below. Thanks for reading! Please comment with any content you want to see and subscribe below. For more videos, check out our video gallery here or our YouTube Channel here. And don’t forget to follow us on social media!